Centrify
Centrify secures access to infrastructure, DevOps, cloud, and other modern enterprise so you can prevent the number one cause of breaches: privileged access abuse.
Set up Centrify
These steps help you set up Centrify as your identity provider:
-
Log in to the Centrify administrator panel.
-
Click Apps.
-
Click Add Web Apps.
-
Select the Custom tab and click Add OpenID Connect.
-
On the Add Web App screen click Yes to create an OpenID Connect application.
-
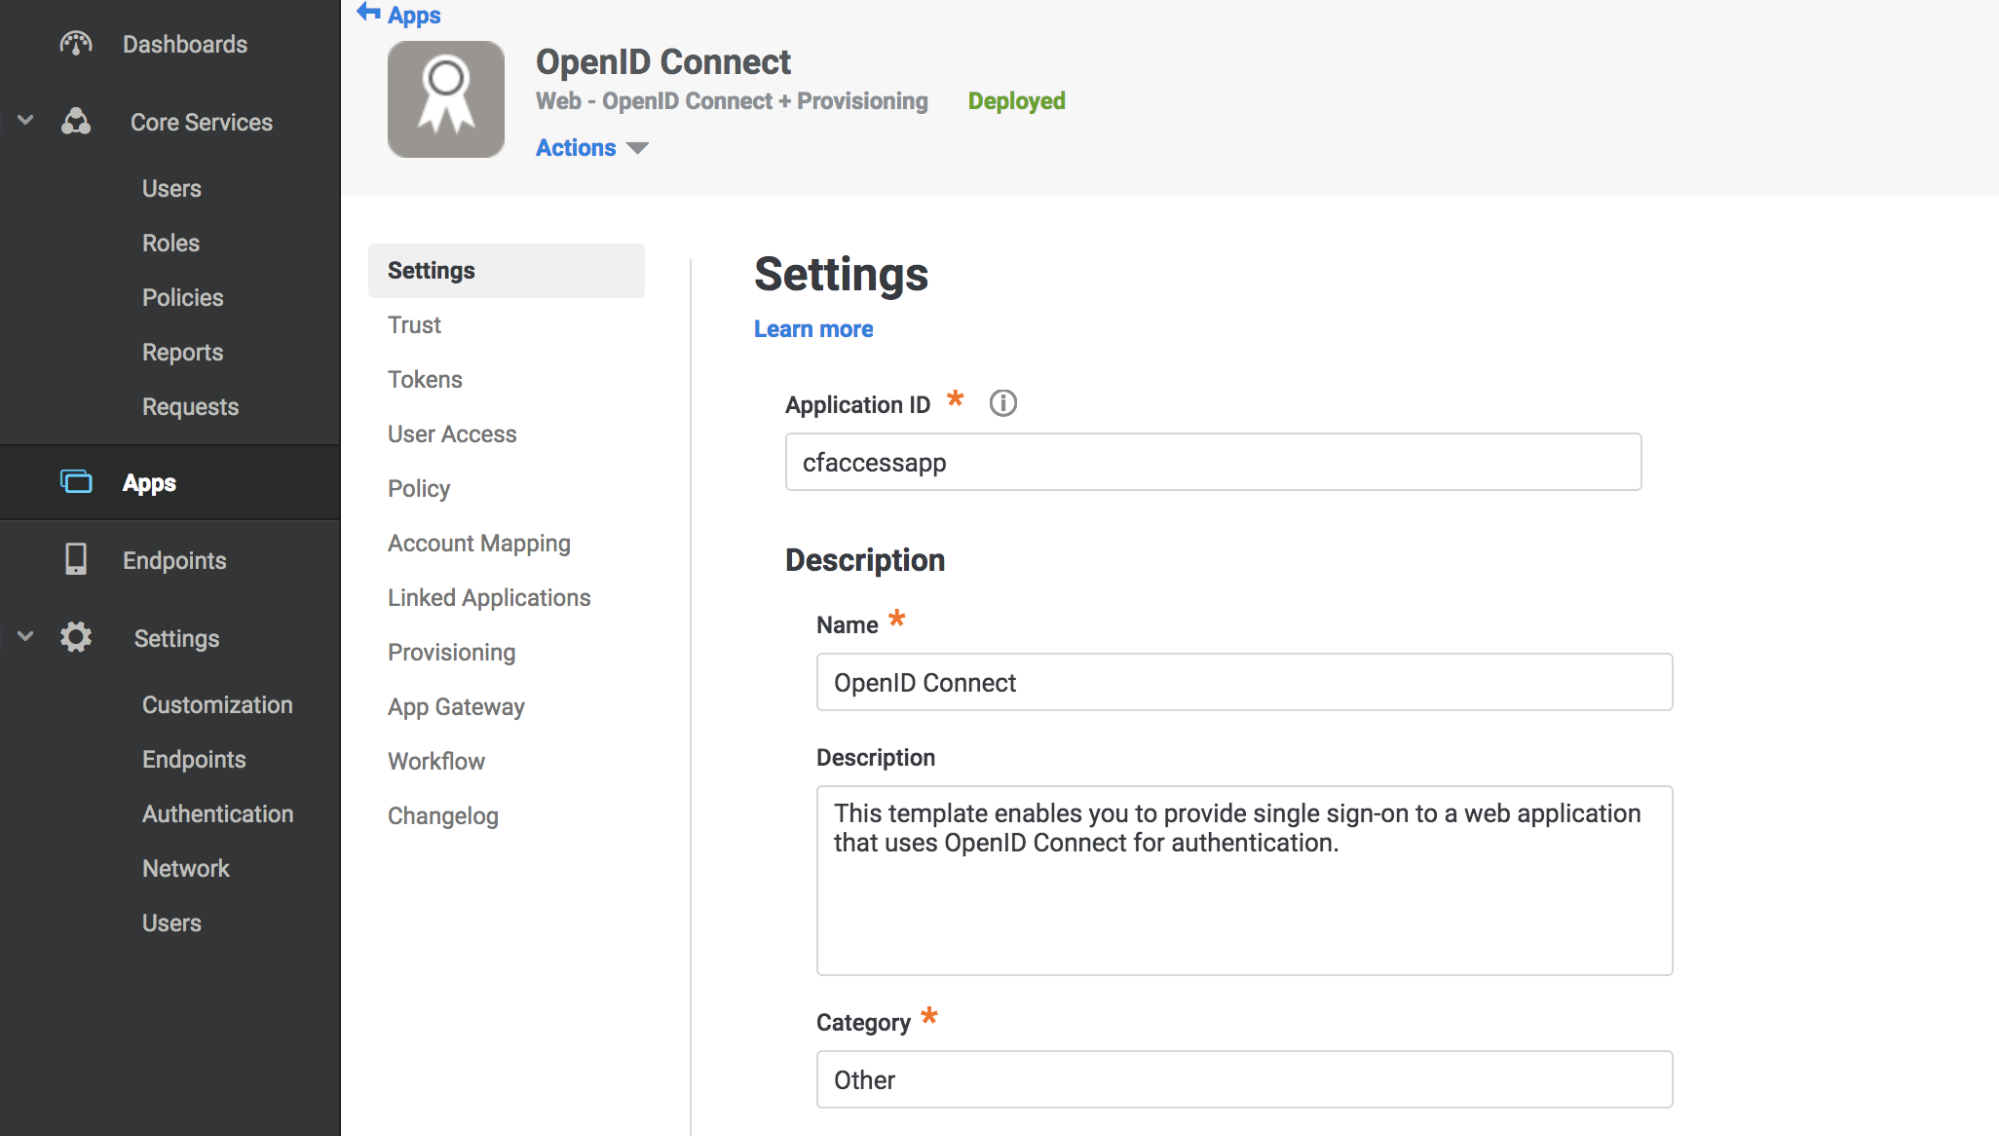
Enter an Application ID.
-
Click Save.
-
Click Trust in the Settings menu.
-
Enter a strong application secret on the Trust section.
-
Under Service Provider Configuration enter your application’s authentication domain as the resource application URL.
-
Under Authorized Redirect URIs click Add.
-
Under Authorized Redirect URIs enter your team domain followed by this callback at the end of the path:
/cdn-cgi/access/callback. For example:https://<your-team-name>.cloudflareaccess.com/cdn-cgi/access/callback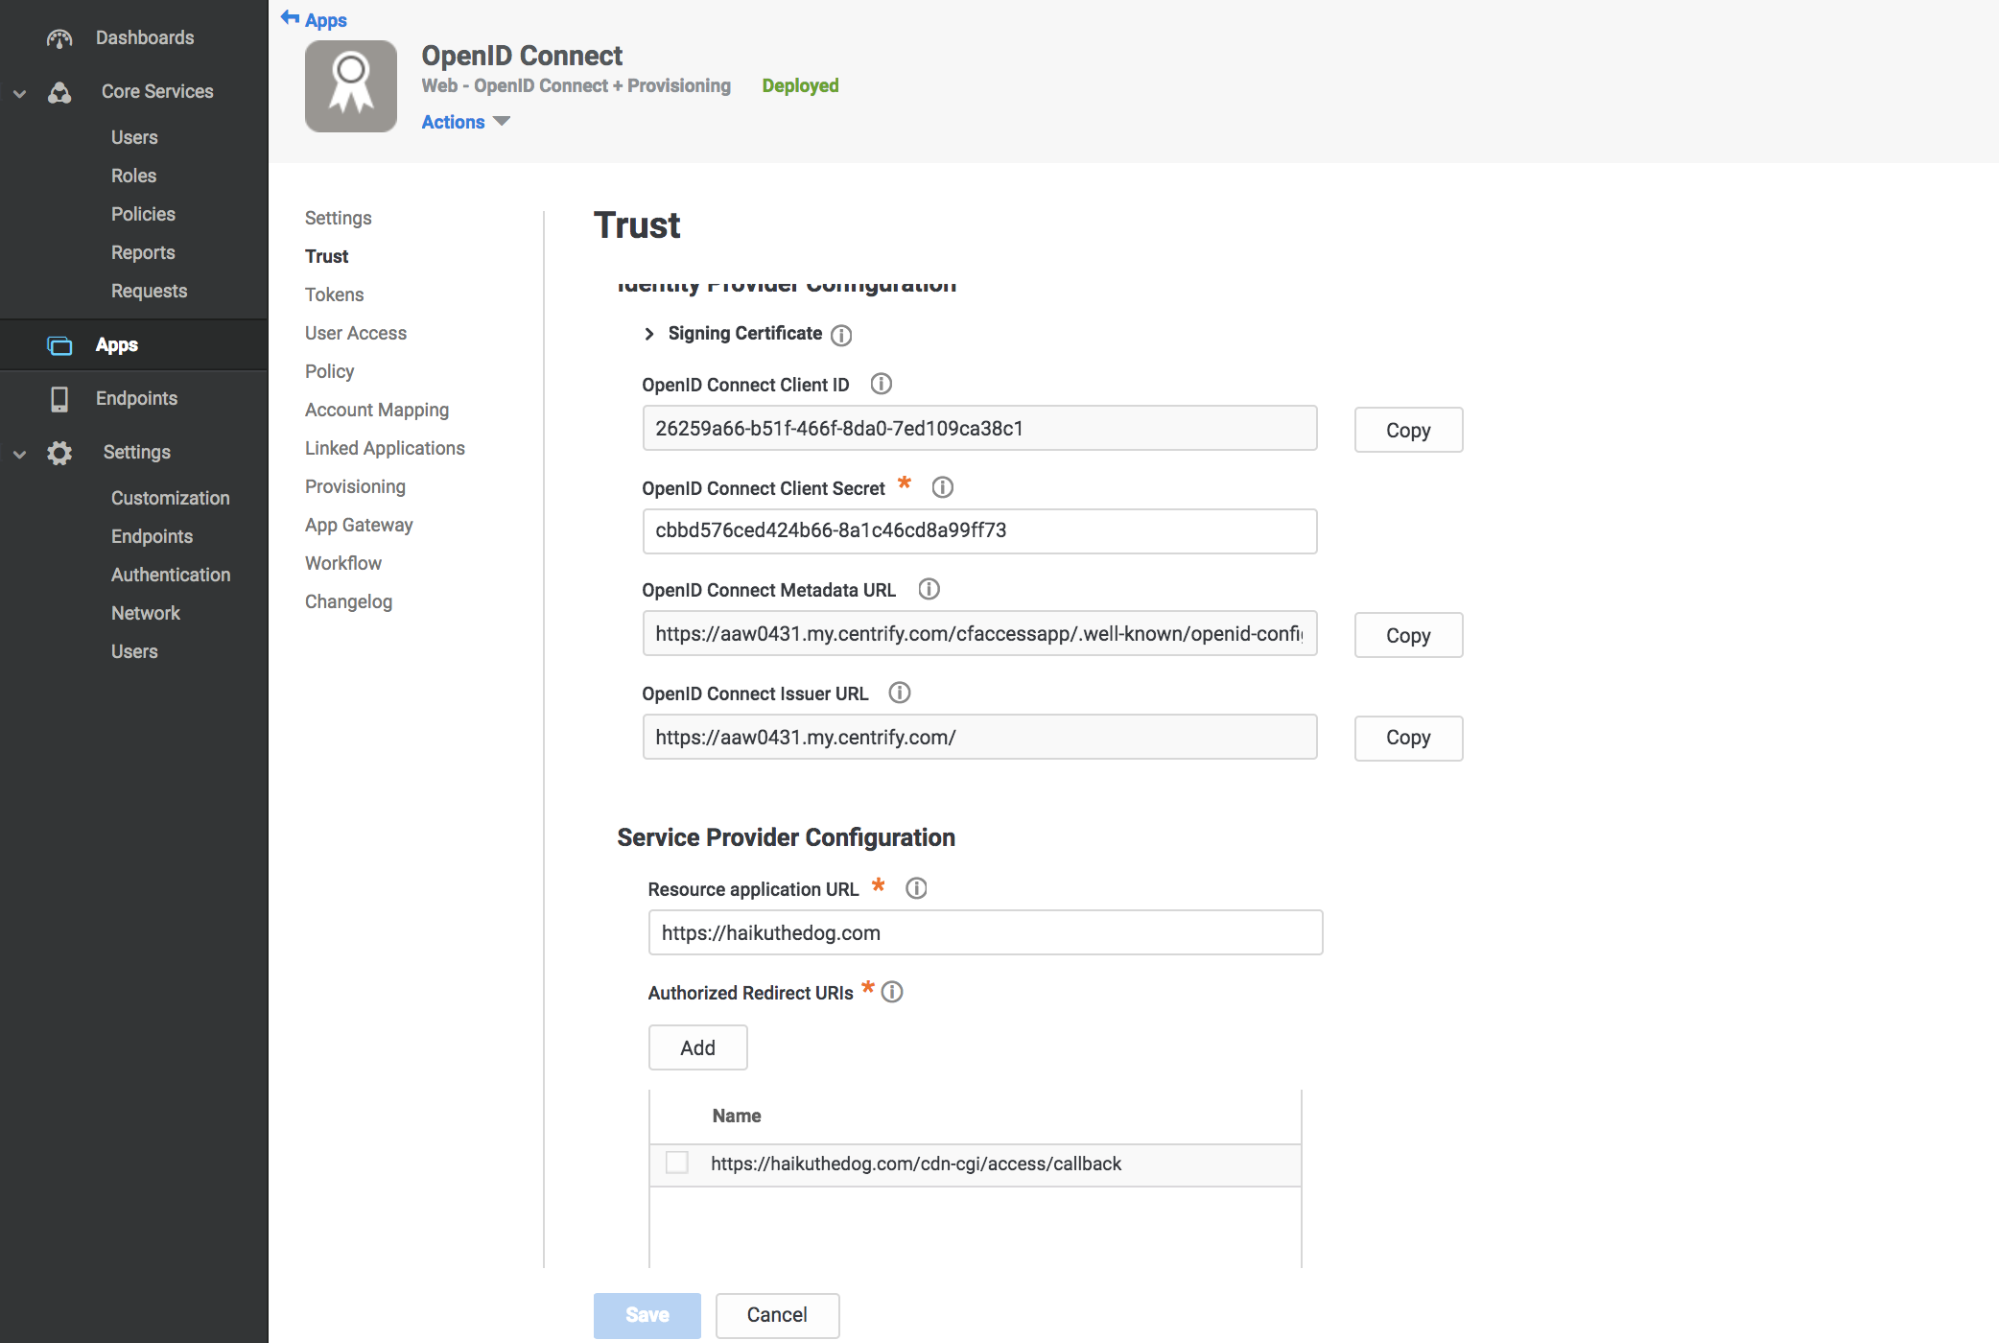
-
Click Save.
-
Take note of the Client ID, Client Secret, OpenID Connect Issuer URL, and Application ID from the Settings tab.
-
Navigate to the User Access tab.
-
Select the roles to grant access to your application.
-
In Zero Trust, navigate to Settings > Authentication.
-
Under Login methods, click Add new.
-
Paste in the Client ID, Client Secret, Centrify account URL and Application ID.
-
Click Save.
To test that your connection is working, navigate to Authentication > Login methods and click Test next to the login method you want to test.
Example API Config
{  "config": {    "client_id": "<your client id>",    "client_secret": "<your client secret>",    "centrify_account": "https://abc123.my.centrify.com/",    "centrify_app_id": "exampleapp"  },  "type": "centrify",  "name": "my example idp"
}